Key takeaways
- Autofocus has nothing to lock on to in the dark, so it hunts or settles in the wrong place. Set focus by hand.
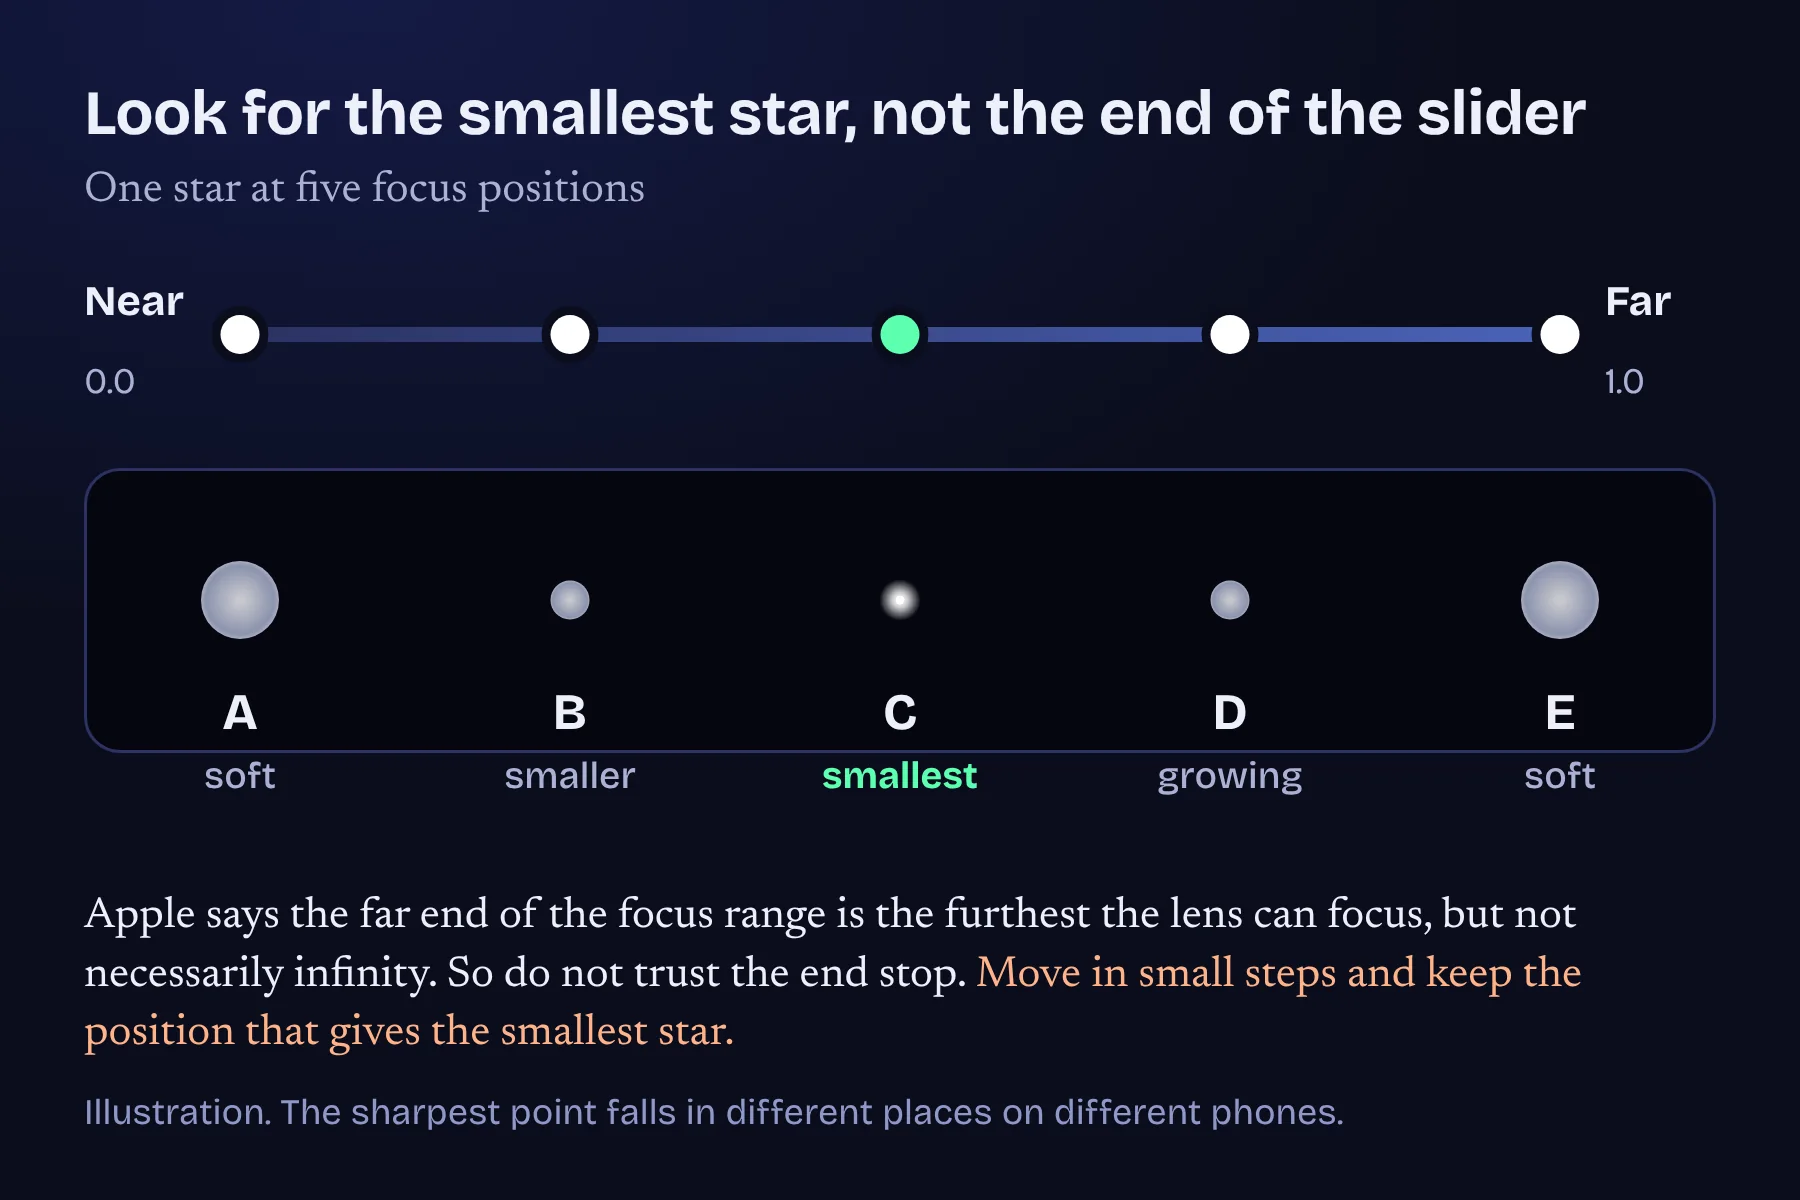
- Apple says the far end of the focus range is the furthest the lens can focus, but not necessarily infinity. Do not trust the end stop: look for the smallest star.
- Focus on a planet, the Moon, a bright star or a distant light, and make it visible in the preview by raising the ISO and the exposure time for a moment.
- Check a test frame at 100 per cent. Round, swollen stars mean focus, stars stretched one way mean trailing, and a haze means dew or a smudge.
Why autofocus fails at night
Autofocus works by looking for contrast, and a dark sky offers almost none. A few faint dots give the phone very little to go on, so it hunts back and forth, locks on to a nearby object or gives up. Even when it appears to work on one shot, it can choose a different focus on the next, and that spoils a sequence of frames you meant to combine.
That is why astrophotographers focus by hand: they set the focus once, on a real star, and keep it. Our guide for a first night with a camera describes the same idea for a larger camera, and the manual focus control in AstroNight’s camera lets you do it on an iPhone.
How manual focus works on an iPhone
On an iPhone the focus is a position between near and far. According to Apple’s developer documentation, the range runs from 0.0, the shortest distance at which the lens can focus, to 1.0, the furthest, and “1.0 doesn’t represent focus at infinity”. The same page adds that a lens position does not correspond to an exact physical distance, and that it is not consistent from device to device.
In plain words, you cannot simply push the slider to the end and trust that the stars are sharp. The end is a good place to start, but the sharpest point can sit a little away from it, and it differs between phones.
What to focus on
| Target | When to use it | Why it works | Watch out for |
|---|---|---|---|
| A bright planet such as Venus or Jupiter | Whenever one is up | A small, bright, steady point | Check where it is with a sky map first |
| The Moon | When it is above the horizon | Very bright, so it is easy to see in the preview | Lower the exposure so that it does not glare, then restore your values |
| The brightest star you can find | On a clear dark night | A true point source, so the best test | It can be faint in the preview until you raise ISO and exposure |
| A distant light | When nothing else is visible | Easy to see in the preview | Pick one as far away as you can, and confirm on a star |
| The horizon at dusk | Before it is dark | You can see what you are doing | Check again once the stars are out |
On most nights the brightest star or a planet is the best choice. Because stars are so far away, they are a more reliable focus target than any light on the ground.
Step by step: set focus on a star
- Find something bright. Choose a planet, the Moon or the brightest star you can find, and aim the phone at it.
- Make it visible in the preview. Raise the ISO and the exposure time for a moment, so that the star shows on the screen.
- Take focus off auto. Switch to manual focus and start at the far end of the range.
- Move in small steps. Nudge the focus a little, take a test frame, zoom to 100 per cent and compare the star.
- Keep the smallest star. Leave the focus where the star is smallest and roundest.
- Set your real exposure and do not touch. Return to your shooting values, use the self-timer, and re-check the focus now and then.
Step two is the one people skip. At your shooting values the preview can be too dark to find a star, so raise the ISO and the exposure time temporarily, find the star, set the focus, and then go back to your real settings. A red light and a dim screen help you do this without ruining your night vision.
Keep it sharp during the night
Focus can drift. A change in temperature changes the lens a little, and a nudge from your finger moves it. Use the self-timer and do not touch the screen during a sequence. Check a frame at 100 per cent now and then, especially after the first half hour, when the phone and the air have cooled. If you moved the phone to a new subject, check again.
If the front of the lens mists up with dew, no focus setting will rescue it. Wipe the lens with a clean, soft cloth, keep the phone warm between shots, and consider a small lens hood.
Soft or streaky stars: what is wrong?
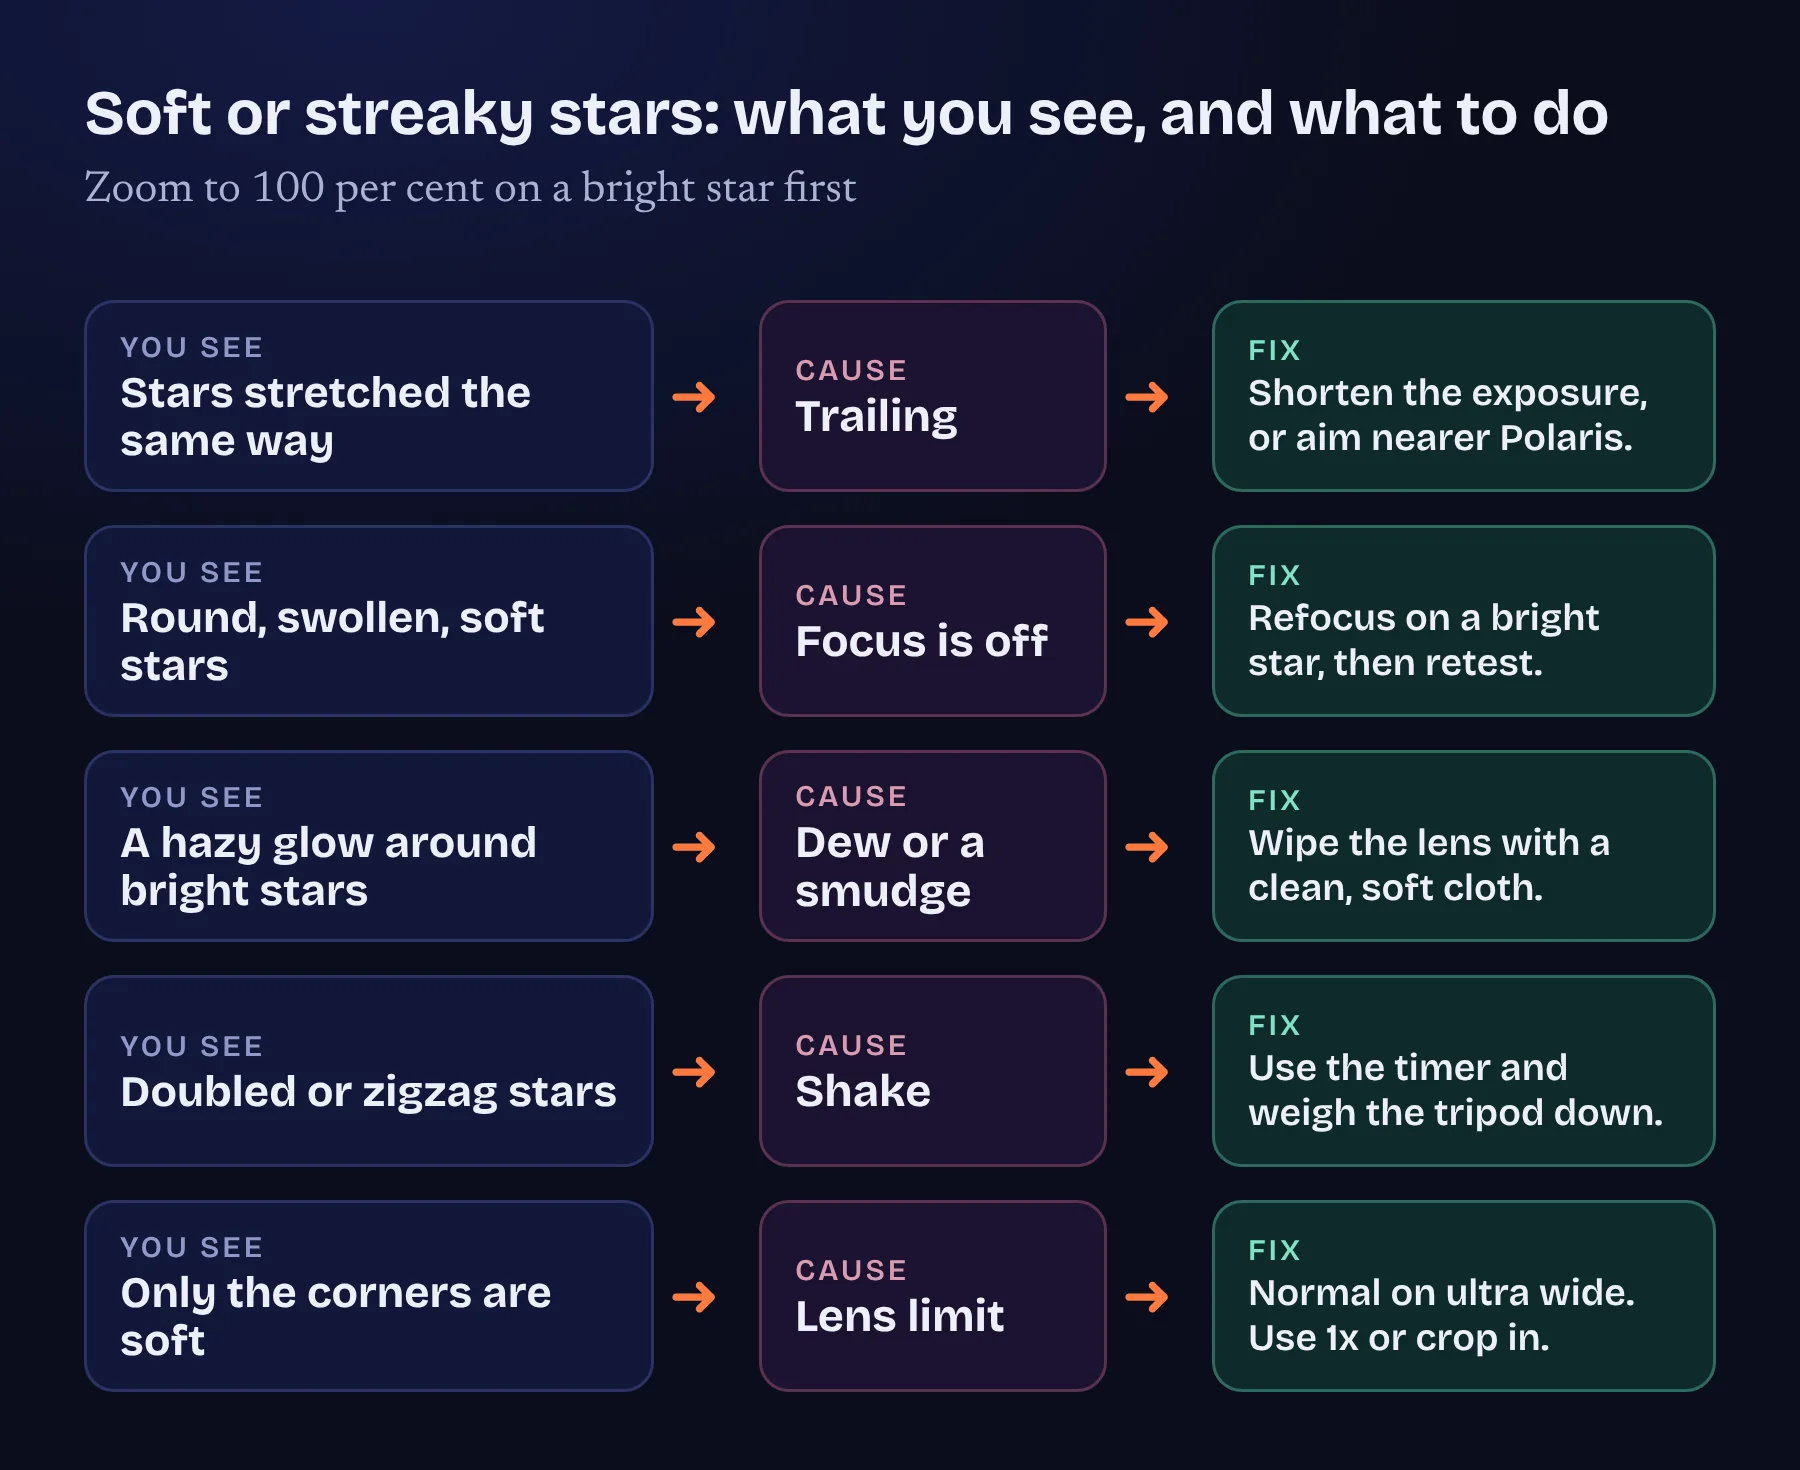
| What you see | Likely cause | What to do |
|---|---|---|
| Stars stretched the same way | Trailing | Shorten the exposure, or aim nearer Polaris |
| Round, swollen, soft stars | Focus is off | Refocus on a bright star, then retest |
| A hazy glow around bright stars | Dew or a smudge | Wipe the lens with a clean, soft cloth |
| Doubled or zigzag stars | Shake | Use the timer and weigh the tripod down |
| Only the corners are soft | A lens limit | Normal on ultra wide. Use 1x or crop in |
A single frame cannot always tell focus from trailing, so shorten the exposure and look again: if the stars become sharp, it was trailing. Reading a test frame covers this in more detail.
Frequently asked questions
How do I focus on stars with an iPhone?
Take focus off auto, find a bright star or planet in the preview, start at the far end of the focus range and move in small steps until the star is as small and round as you can make it. Then leave the focus alone.
Why are my star photos blurry on iPhone?
The usual causes are autofocus, an exposure that is long enough to trail the stars, a phone that moved during the shot, or dew or a smudge on the lens.
Is the far end of the focus slider infinity?
Not necessarily. Apple’s documentation says that the far end is the furthest the lens can focus but does not represent focus at infinity, so check on a real star.
Can I focus on the Moon instead of a star?
Yes, it is easy because it is so bright. Lower the exposure while you focus, and check again on a star if you can.
Does focus change during the night?
It can. Temperature changes and bumps move it, so check a frame at 100 per cent every so often.
Should I use tap to focus?
Not for stars. It relies on contrast that a dark sky does not provide. Set the focus by hand.
Sources and further reading
AstroNight is now on the App Store. The free planner, coach and manual night sky camera works on iPhone and iPad with iOS 17 or later, offline, with no account. Get it on the App Store.