Key takeaways
- Night mode chooses the exposure, the focus and the colour for you, which is perfect for a quick, pleasing picture.
- A manual camera fixes ISO, exposure time, focus and white balance, so your iPhone astrophotography becomes repeatable.
- Only a manual camera lets you shoot RAW and take many identical frames for stacking.
- Start with night mode, then move to a manual camera when you want to improve on purpose.
What night mode really does
Night mode takes several frames and merges them into one bright, smooth picture. It decides the exposure time itself, and on a tripod it can use a longer exposure. For a street, a campfire or a moonlit landscape it works beautifully, and it is the fastest route to a good night picture.
The trouble starts with stars. Night mode smooths noise, and faint stars can be smoothed away with it. The exposure changes from shot to shot, the colour drifts, and you cannot tell the phone to repeat what worked. For serious iPhone astrophotography that lack of control is the limit, not the lens.
What a manual camera adds
A manual camera hands you the controls: ISO, exposure time, focus, white balance, the lens and the number of shots. The AstroNight manual camera also saves RAW and offers a self-timer, so the iPhone can stay perfectly still on the tripod. See the full story in AstroNight now has a manual camera.
The real prize is repeatability. When you can type 15 seconds and ISO 1600 and get the same result tomorrow, every night becomes a lesson instead of a lottery. That is how iPhone astrophotography improves.
Night mode and a manual camera side by side
| Feature | Night mode | Manual camera |
|---|---|---|
| Exposure time | Chosen by the phone | Chosen by you |
| Focus | Automatic, often hunts at night | Set by hand on a star |
| White balance | Automatic, may drift | Fixed, for example 3800 to 4200 K |
| RAW | Usually not available | Yes, for the best editing |
| Many identical frames for stacking | Difficult | Easy |
| Star photos | Pleasing but smoothed | Sharper and more natural |
| Ease for a beginner | Excellent | Needs a little practice |
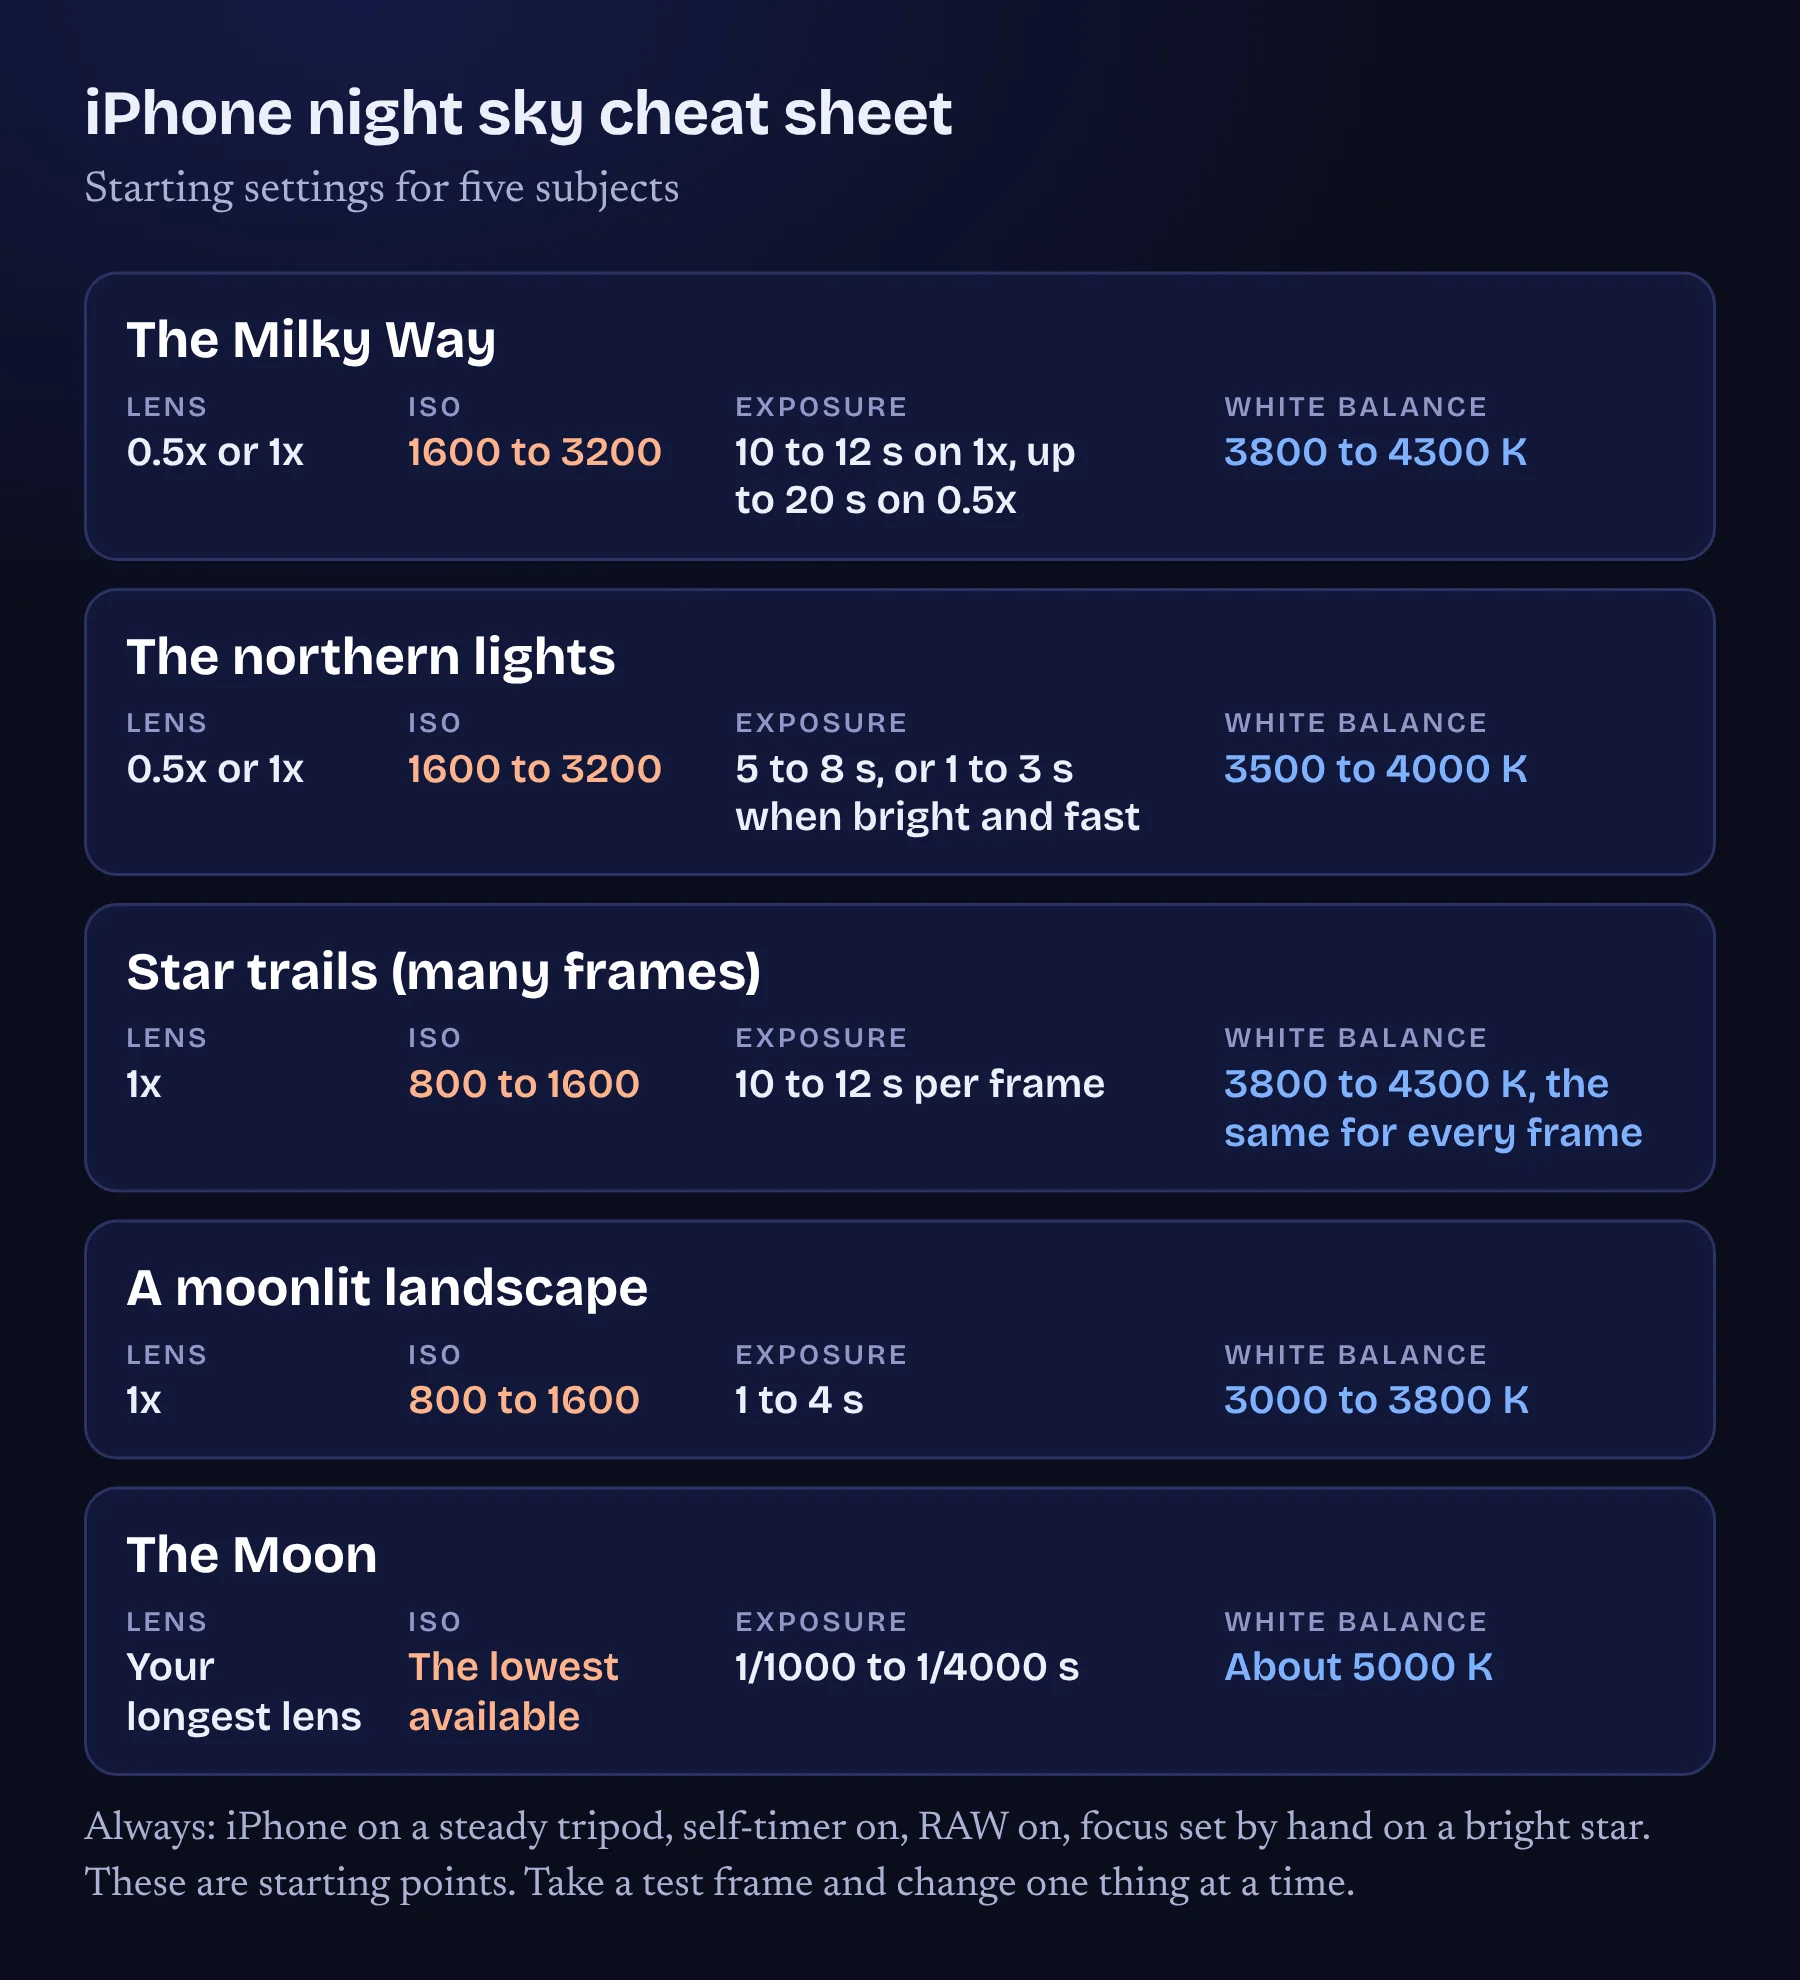
Neither is wrong. Night mode wins on speed and convenience, and a manual camera wins on control and quality when you are willing to learn. If you want the numbers, see the best iPhone settings for night sky photos.
How to move from night mode to a manual camera
Take your first night sky picture in night mode on a tripod, so you know what the phone can do. Next, repeat the same scene with a manual camera, using the cheat sheet settings, and compare the two on your screen. Look at the stars first: are they sharp points or soft smudges? Then check the colour and the noise.
Within three nights you will know which one you prefer for which subject, and that is the right way to choose. Night mode for family evenings and cities, a manual camera for the Milky Way, the aurora and star trails. Read how to focus on stars with an iPhone before your first manual night.
Frequently asked questions
Is night mode good for stars?
It is good for bright stars and a moonlit landscape, but it chooses everything automatically and can smooth away faint stars. A manual camera gives sharper, more natural results.
Do I need a manual camera for iPhone astrophotography?
Not to begin, but you will want one as soon as you want repeatable settings, RAW files or stacking.
Can I use night mode and a manual camera together?
Yes. Many people use night mode for quick pictures and a manual camera when they plan a proper session.
What is the best first setting for the Milky Way?
Try ISO 1600 to 3200, an exposure time of 10 to 15 seconds on the 1x lens, manual focus on a bright star and a white balance of about 4000 K.
Sources and further reading
AstroNight is now on the App Store. The free planner and coach for astrophotography works on iPhone and iPad with iOS 17 or later, offline, with no account. Get it on the App Store.