Key takeaways
- Most astrophotography mistakes come from automatic settings, a wobbly phone or an exposure that is too long.
- Blurry stars have only a handful of causes, and a zoomed-in test frame will tell you which one.
- Every beginner makes the same mistakes. Fixing them one night at a time is the fastest way to improve.
- Keep a checklist, and run it before you shoot, not after you get home.
The ten astrophotography mistakes beginners make
| Mistake | What you see | Fix |
|---|---|---|
| 1. Leaving focus on auto | Soft, blurry stars | Set manual focus on a bright star |
| 2. Holding the phone | Shaky, double stars | Use a tripod and the self-timer |
| 3. Exposure too long | Short trails instead of points | Use the 500 or 300 rule |
| 4. ISO too high | A grainy, noisy sky | Lower the ISO and stack more frames |
| 5. Auto white balance | A green or orange sky | Set about 4000 K by hand |
| 6. Shooting only JPEG | Colour you cannot rescue | Shoot RAW |
| 7. No test frame | A dud you discover at home | Check every setup on the spot |
| 8. A bright screen | You lose your night vision | Use a red light and a dim screen |
| 9. A dirty lens | Haze, dew and halos | Wipe it and keep it warm |
| 10. Giving up after one frame | A weak result | Take many frames and stack them |
Find the row that matches your picture, and you will usually find the fix in the same line.
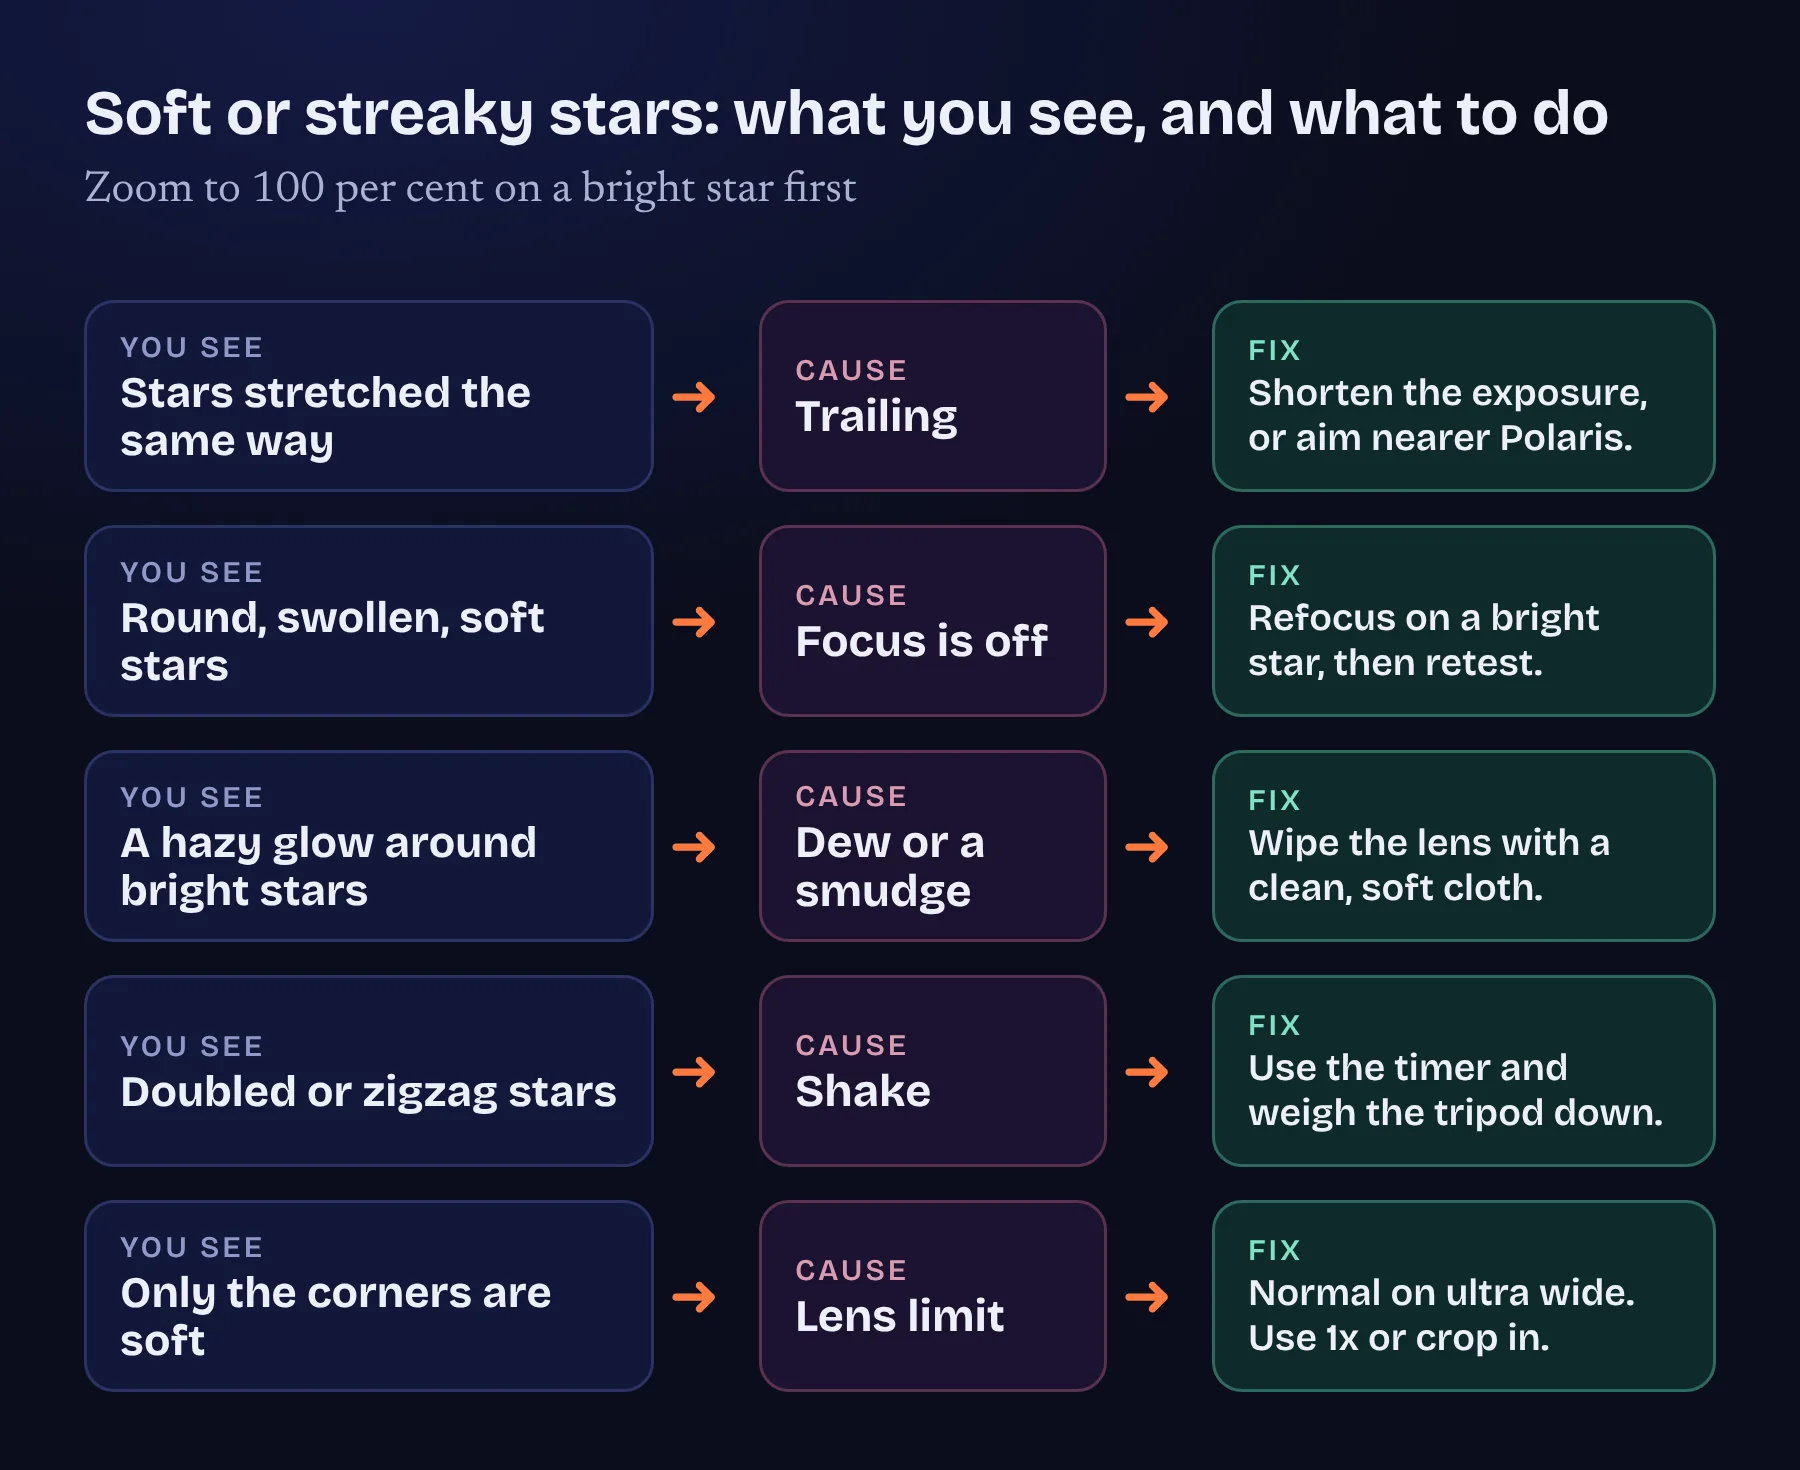
Why blurry stars are the first problem
Blurry stars are the most common sign of beginner astrophotography mistakes, and the cause is almost always focus. Autofocus does not work in the dark, so the phone gives up and leaves the lens somewhere near, not at infinity. Switch to manual focus, point at a bright star or planet, zoom in and move the slider in small steps until the star is as small as it will go.
Our full guide, how to focus on stars with an iPhone, covers the dew, the smudges and the trailing that can also soften a picture. If your stars are short streaks instead of soft discs, the exposure is too long. The chart of the best iPhone settings for night sky photos gives safe limits for every lens.
A beginner checklist you can keep on your phone
Before you press the shutter, run through five quick checks. Is the phone clamped on a tripod? Is the focus set by hand? Is the exposure time inside the limit? Is the white balance fixed and RAW switched on? Is the lens clean? Five checks take two minutes and prevent most blurry stars.
After the first frame, zoom in to 100 per cent on a star in the middle and one in the corner. If both are sharp, carry on. If not, change one thing and try again. Reading a test frame before you go home shows what to look for.
Every beginner starts here
It is easy to feel that everyone else gets the perfect picture on the first night. They do not. The difference is a short loop: plan, shoot, check and adjust. The AstroNight night loop turns the ten astrophotography mistakes above into a routine, so every beginner can improve on purpose. Be kind to yourself, keep notes and go out again tomorrow.
Frequently asked questions
What is the most common astrophotography mistake?
Leaving the focus on automatic. The phone cannot focus on a dark sky, so stars come out soft. Set the focus by hand on a bright star.
Why are my stars not sharp?
The usual causes are focus, shake, dew on the lens and an exposure that is too long. A zoomed-in test frame shows which one it is.
How long can I expose before stars trail?
On a 1x iPhone lens, about 12 to 21 seconds by the 300 and 500 rules. A telephoto lens needs much less.
Is a tripod really necessary for a beginner?
Yes. Without one, even a short night exposure will be blurred by your hands. Any steady tripod will do.
Sources and further reading
AstroNight is now on the App Store. The free planner and coach for astrophotography works on iPhone and iPad with iOS 17 or later, offline, with no account. Get it on the App Store.